Over the years I've struggled to find the best camera settings for pelagic bird photography. I've finally settled on what works best for me for photographing birds from a boat at sea. Those are listed above. Now I'll tell you why I like them. I also found some recommendations from others that I'll share when they are different from my settings. Then I'll give you a great tip I received that helps me instantly dial in all the correct settings.
Note: This post assumes intermediate or advanced knowledge cameras and photography in general, and rather intimate knowledge of the settings and menus on your personal DLSR camera with telephoto lens. Your camera's user manual is your friend.
The reasons for my settings
Every camera/lens combination is unique. I have the older Canon 100-400 lens. It is a bit soft in focus when it is wide open. It takes sharper photos when the aperture is 7.1 or higher. The image stabilization will let me take hand-held photos down to 1/400 of a second or slower. Sometimes. But I find that 1/640 is as slow as I should go with a stationary bird, hand-held, on land. On a boat? Better get it up to 1/800 or higher. 1/1250 seems ideal for most of my photography. For fast-flapping birds, 1/2400 will freeze most wings. But I want to keep ISO to 1000 or under. The closer to ISO 100 the clearer and sharper will be my photos.Hitting the bird with the focus point is hard. I use the single point AF. The camera has a plethora of zone autofocus points I could use. But the depth of field on my lens is so shallow that using more than one autofocus point will miss the focus on this telephoto lens. You should expect to have a difficult time staying with a bird for a long burst of photo shots. The boat is just too bouncy. Sky, water, sky, bird, water, sky,... each consecutive shot is focused somewhere else! Expect a lot of bad shots.
Likewise, single point exposure is not reasonable when it is so hard to track a bird, and most birds will be small in frame. Use evaluative metering.
The camera wants to make the sky, or water reflecting the sky, expose to 17% gray. Thus, birds against the sky or bright water frequently will be under-exposed. So I bump up the exposure compensation. Sometimes only 1 or 2 thirds is necessary, sometimes 2 full stops might be best. I start at 1 full stop, examining my shots from time-to-time to adjust as necessary. Of course, if you've got the sun behind you, and a white bird, those highlights are going to be blown out. So you may want to cancel positive exposure compensation if those conditions are reached.
 |
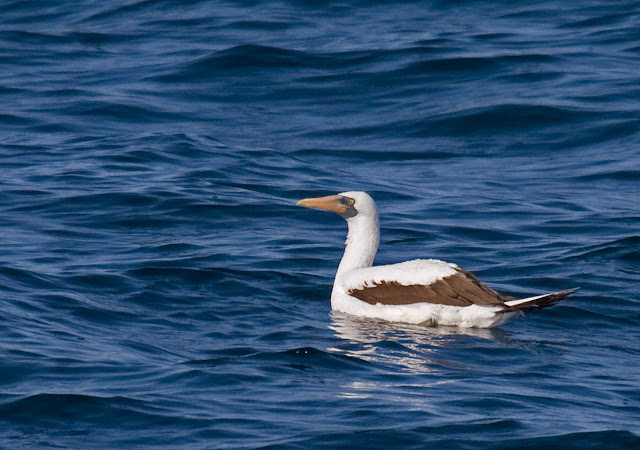
When the bird is in sun and this close, automatic camera settings do just fine.
Nazca Booby off San Diego, California. June 10, 2018.
1/2000 sec f/7.1 400mm ISO 400. Av mode.
|
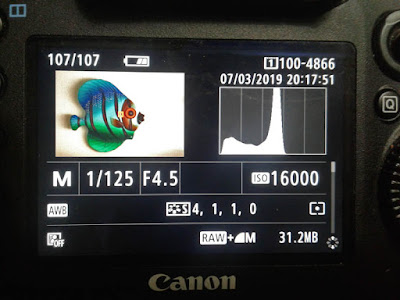
When lighting conditions change--Use your histogram!
Many pelagic trips start under a marine layer of clouds or fog. So you may need to adjust your settings to add more light. Remember that 3 clicks of aperture doubles your light--f/7.1 to f/5.0 doubles your light. So does halving your shutter speed. Changing 3 clicks from 1/1250 to 1/640 also doubles your light. As the day gets brighter, the sun breaks out, or you switch to a different side of the boat, you will need to check your histogram. You will also want to do some chimping--checking your photos to make sure they are exposed correctly. Just remember that chimping uses battery power and pelagic trips may last 12 hours. You don't want to run your batteries down. And always carry a spare!With all the movement: you, the bird, the boat on the waves, and the motor vibration, you'll want to keep the shutter speed up, 1250 to 2400 to freeze motion. But you have to balance the light with the AUTO ISO. You want ISO as low as possible to keep from having grainy low-light exposures.
 |
| Use your histogram to adjust your settings. That histogram is terrible. Expose to the right! |
What others recommend
A search of the web finds these authors recommend some different settings. You should try them yourself and see if they work for you.Georgina Staytler, on her blog, recommends higher shutter speeds--up to 1/4000 of a second. I recommend that too, if there's enough light. There may be enough light on a nice clear day with the sun to your back. She also suggests a small zone focus--a center focus with 4 helper points around it. Try it. It didn't work for me, but may be perfect for your camera/lens combination. If it focuses properly in that configuration it will aid staying on the bird with all the boat and bird movement.
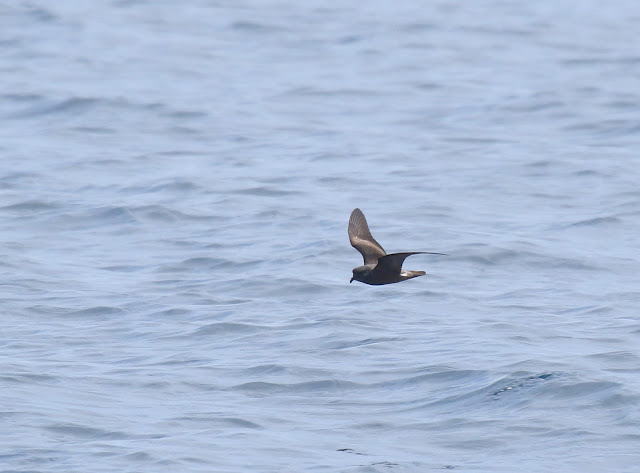
Oh, here's something I had forgotten. Jonathan Ley, on the phlumf web site, reminds us that if the focus falls off the bird the camera searches back and forth to acquire focus. Your lens may have a setting for 3.5 meters to infinity (∞) and 8 meters to infinity. Setting the lens to "8m to ∞" will make the lens focus faster. Just remember to put it back when birds are closer or back on land! "Why won't my camera focus on this close bird!" He also recommends zone focus rather than single point focus. Here's the problem, as he explains. The camera often focuses on the water in front of or (more often) behind the bird. I've gotten pretty good at actually focusing on the water under where the bird is flying. Otherwise, with the bird too small in frame to focus on, the camera will choose the background waves. I have many photos of beautiful waves with out-of-focus birds flying in front of them. I often hope for the bird to wheel up above the horizon line. The camera really focuses well with an empty sky behind the bird!
Dorian Anderson, at the Speckled Hatchback, suggests shooting Aperture priority (Av) if you really don't want to shoot Manual. Then you can choose an ISO like 400 or so, shoot wide open aperture (f/5.6 for Canon 100-400mm) and let the camera choose the shutter speed. He recommends as high as shutter speed as possible, perhaps at least 1/1600 and bump up the ISO. As he notes, you can edit out some ISO noise, but you can't fix blurry or out-of-focus images. Better, you can shoot AV, set aperture to f5.6, 6.0, or 7.1 and a shutter speed of 1600, and Auto ISO, if your camera has that feature.
Custom Camera User Settings
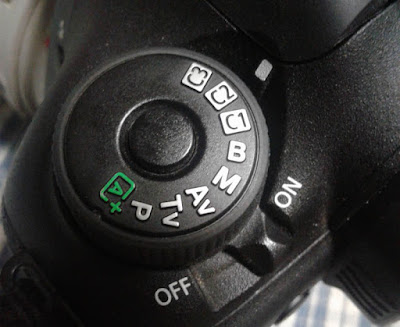
If you are always using a specific suite of camera settings for certain types of photography, then you should save those settings into one of the 3 Camera User settings (C1-3).In bird photography, your subject and lighting can change fast! I was photographing flycatchers at close range and decent golden morning light. I glanced up to see a pair of nighthawks winging my way, high in the sky. Oh, quick! I have to increase my exposure compensation, change from spot metering to evaluative, and change autofocus from spot AF to zone AF. Well, I changed to zone AF--the most important setting--and took a couple of shots, barely in time. The exposure was dark, but I bumped up the brightness in post processing. I got an acceptable "documentation" photo. It could have been so much better. I should have had a "flying bird" custom setting like fellow birder Gary told me in May. When we were together on the June pelagic trip, you better bet I had just such a setting! In fact, I have my "walking around birding" setting, my "flying bird" setting, and my "pelagic birding" setting.
Check your manual for setting these, but the general way is to set your camera up the way you want, then press the Menu button and go to the appropriate menu list and register your settings to C1, C2, or C3. When you want to recall these settings, just turn the Mode dial to the number you registered and start shooting!
 |
| You've got 3 programmable custom settings. Use them! |


No comments:
Post a Comment
I really want to hear from you! I've changed settings (again) in order to try to make commenting easier without opening it up to spammers. Please note, however, that comments to posts older than 14 days will be moderated. Thank you.